
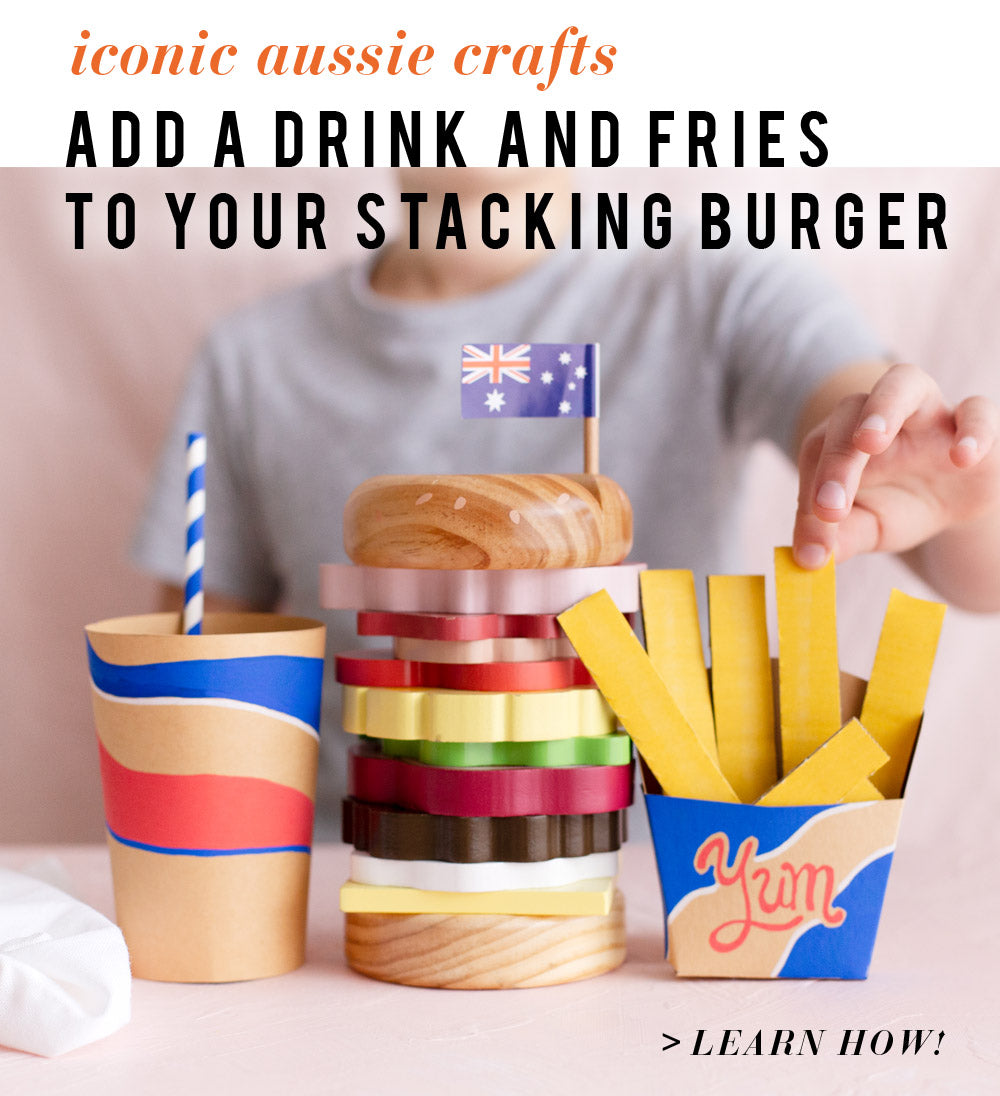
Craft: add a drink & fries to your wooden toy Burger
Turn Playtime into a Full Meal Experience
We love helping you extend your wooden toy play with fun and unique ideas designed to bring even more life to your little one’s imagination. It’s all about taking what you already have and building on it, turning simple play into something bigger, more creative, and even more engaging.
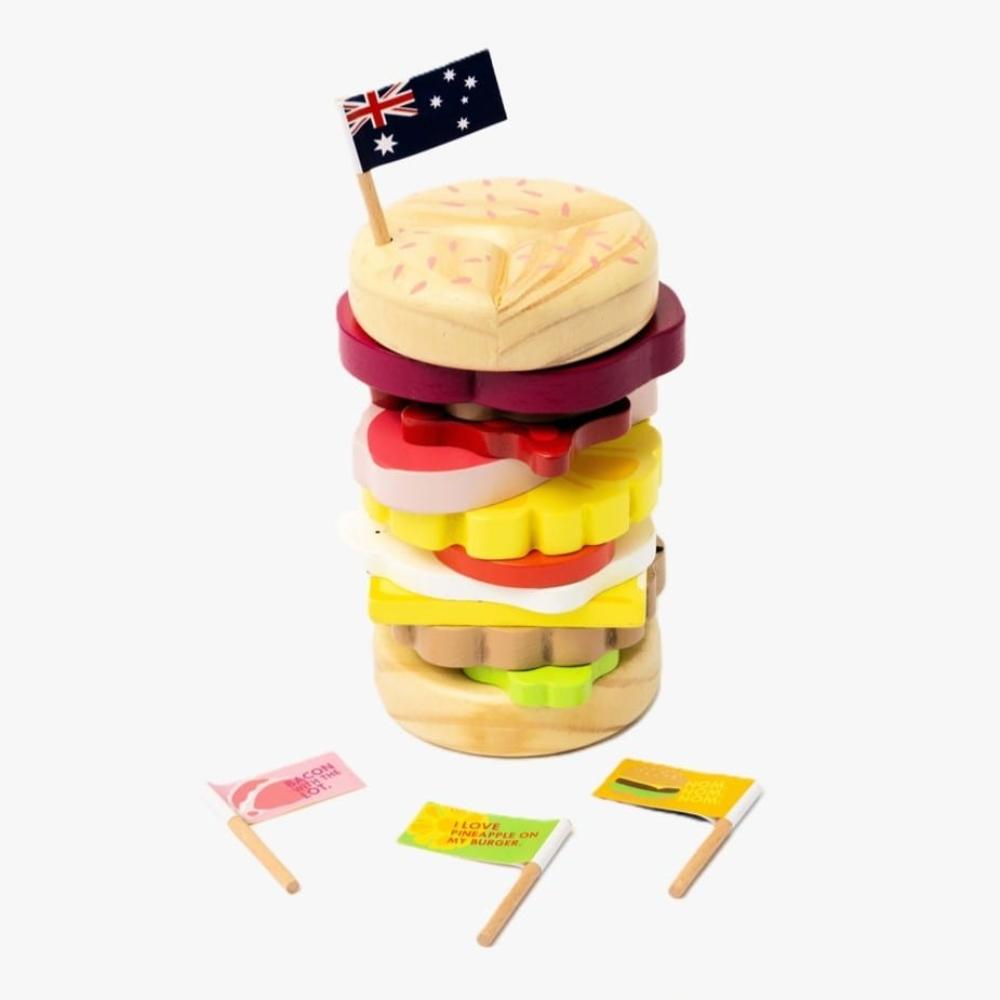
With our latest crafting activity, you can take a tasty Iconic Stacking Burger from our online shop and turn it into a full meal experience at home. By adding your own DIY fries and drink creations, kids can serve up a complete feast, transforming their play kitchen into a bustling café or takeaway spot.
It’s a simple, hands-on way to combine crafting with imaginative play, giving children something they can make and then use again and again. Just read below to find all the easy step-by-step instructions and get ready for hours of creative, food-inspired fun!
What You’ll Need
To create your very own fries and drink set, gather these simple materials before you begin. Everything here is easy to find and perfect for a fun, hands-on crafting session with your little ones.
- Make Me Iconic paper template (download below)
- Scissors
- Lead pencil
- Metal ruler (for clean, straight edges)
- Posca pens (any colours you love for decorating)
- Double-sided tape (for easy assembly)
- Cutting mat (to protect your surfaces)
- A2 kraft paper (240gsm for a sturdy finish)
- Stanley knife (for precise cutting – adult use recommended)
- Thick cardboard offcuts (to give your pieces extra strength)
Having the right materials ready makes the whole process smoother and more enjoyable. It also means kids can focus on the fun part, decorating, assembling, and bringing their play food creations to life!
Download the template below

Instructions
Start by printing and cutting out your Make Me Iconic paper template, using scissors for the main shapes and a Stanley knife for any detailed sections. Place your template onto the A2 kraft paper and trace around each piece with a lead pencil, using a metal ruler to keep your lines clean and straight.

Step 1. Download you Make Me Iconic template and print it out. Cut around all the paper templates plus the middle of the circle.

Step 2. Place the paper templates on your chosen brown Kraft paper and trace around them using a soft lead pencil. Then draw even lines from the inner circle to the outer circle like the picture above.

Step 3. Cut around the template using scissors and cut cut even lines around the circle.

Step 4. Using a metal ruler bend all the pencil lines at 90 degrees to get a sharp score or crease in the paper.

Step 5. Put double sided tape on the two front flaps of the chip packet and attach the front to the back.

Step 6. Place double sided tape down the flap of the drink sleeve. Remove the white backing and seal up the drink by creating a cylinder.

Step 7. Grab your circle card and fold up all the cut sections (like shown).

Step 8. Place one line of double-sided tape at the smallest end of the cup on the inside.

Step 9. Stand the cup upright and gently place in the circle at the top and push it down until it reaches the double-sided tape.

Step 10. Cut strips of old cardboard into 2cm strips at varying lengths to create your chips.

Step 11. Now you are onto the final stage! Now use your colourful Poscas pens to decorate your cardboard drink and chip packet. Hey presto! You are done!
Once complete, your DIY fries and drink are ready to serve, perfect for adding to your burger and creating a full pretend meal for hours of imaginative fun! Kids can set up their own café, take orders, and serve up their creations to family and friends, turning simple play into a full dining experience. It’s a wonderful way to combine crafting with storytelling, where what they make becomes part of their everyday play again and again.


Leave a comment
This site is protected by hCaptcha and the hCaptcha Privacy Policy and Terms of Service apply.